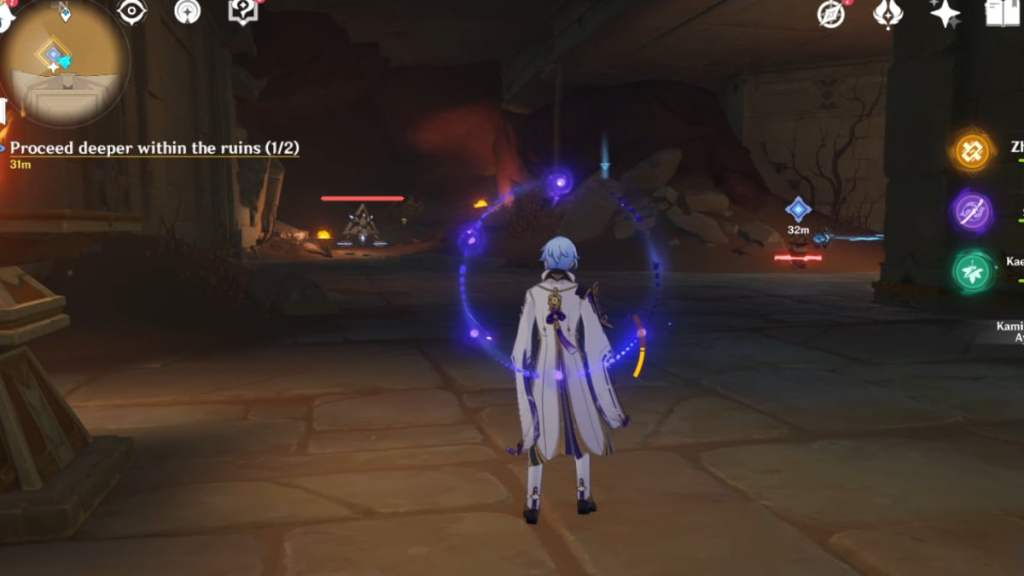
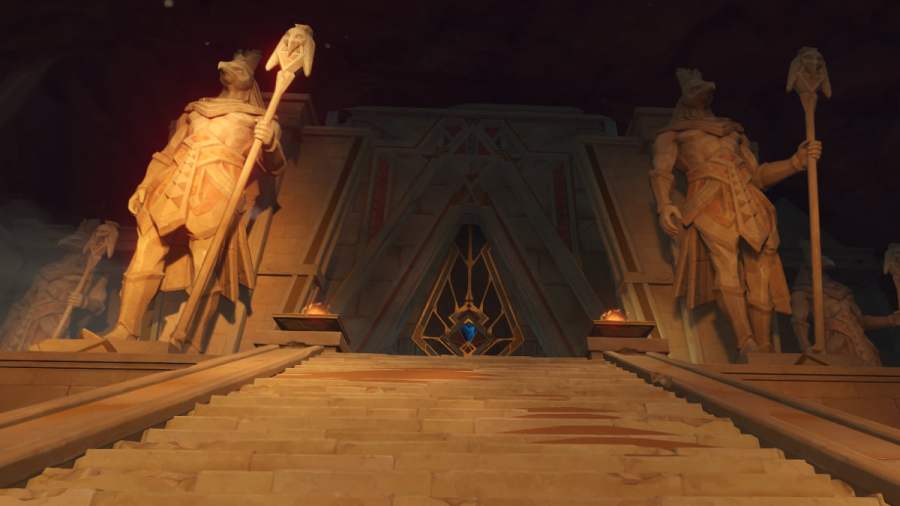
The Secret of Al-Ahmaris the third part of theGolden Slumber World Questline, where you, Tirzad, and the mercenaries explore The Mausoleum of King Deshret. You’ll encounter plenty of puzzles in the dizzying, maze-like interior—one of which involves finding a way to proceed deeper within the ruins.
Proceed deeper within the ruins in Genshin Impact – The Secret of Al-Ahmar Sumeru World Quest
This segment is fairly simple: you need to find two Primal Embers and lead them back to their torches in Opet Hall. However, due to the maze-like interior of the Mausoleum, it can be a little difficult to navigate your way around. Follow these steps to find the two Primal Embers.
Related:How to get Glabrous Beans in Genshin Impact
First Primal Ember
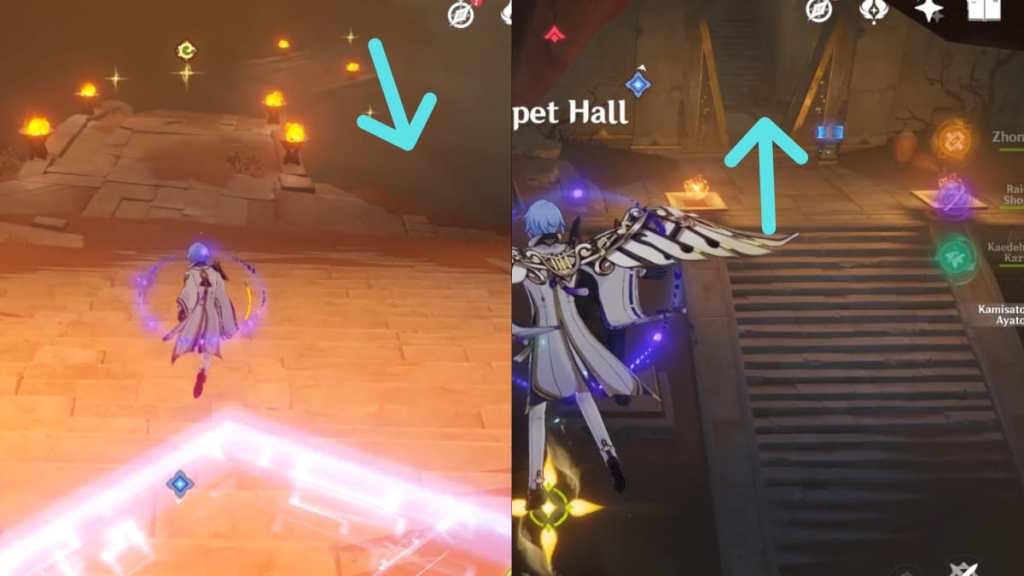
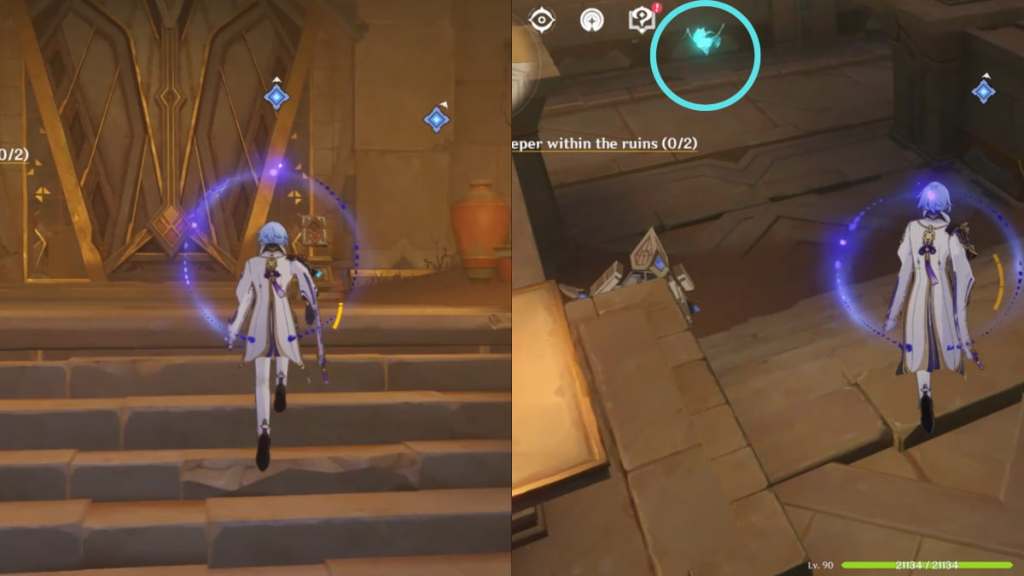
Follow the quest marker to Opet Hall and climb the stairs to find a Control Unit. Interact with it to open the gate leading into a room, where you’ll find aSeelie. Follow the Seelie until it reaches its Court.
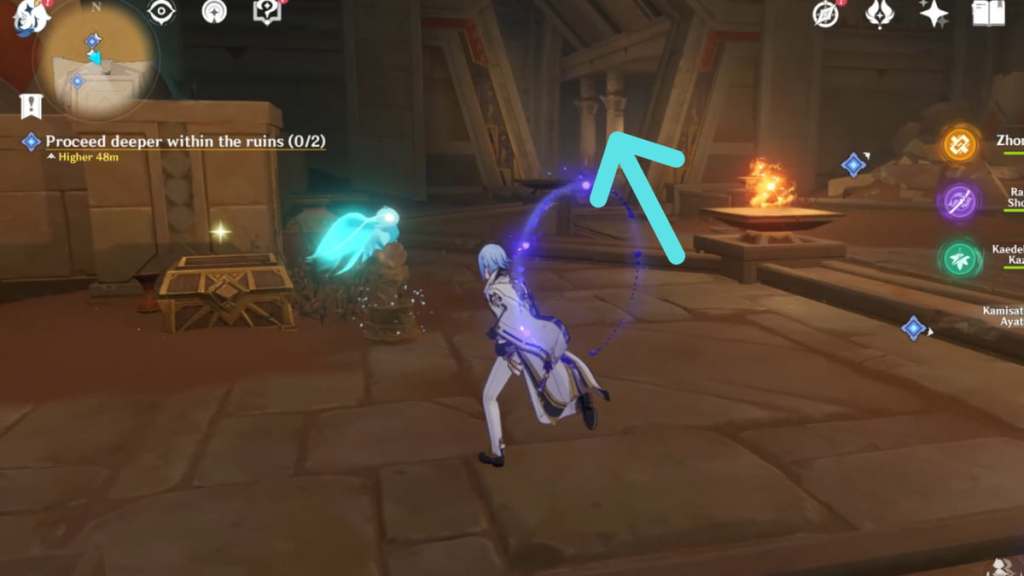
Once the Seelie reaches its Court, enter the room ahead—the arrow is pointing to its exact location in the image above. You’ll find a Primal Construct inside, which you should defeat so that it doesn’t get in the way. There’s also a symmetrical puzzle on the left and right sides of the room. Pay attention to theright side.
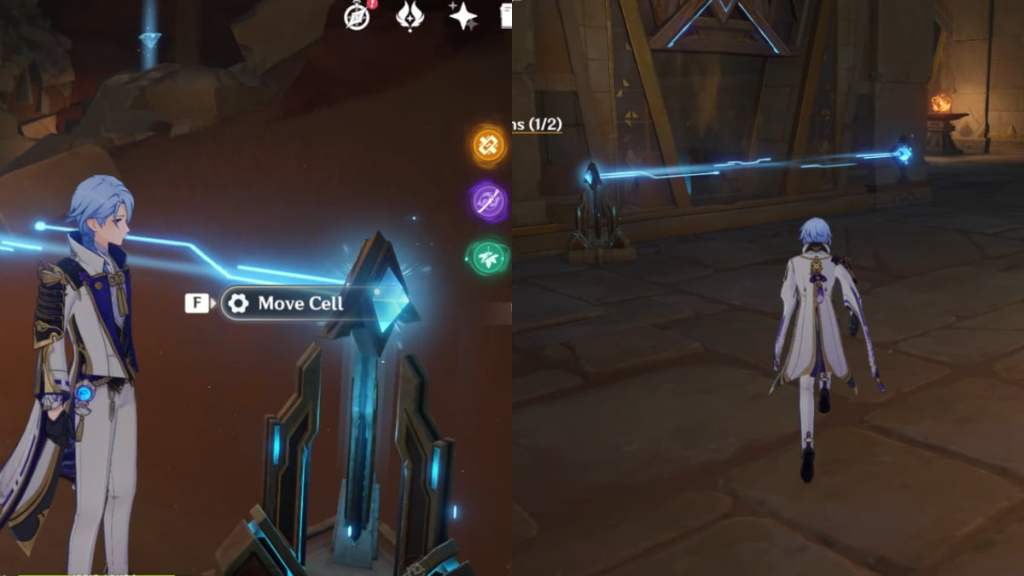
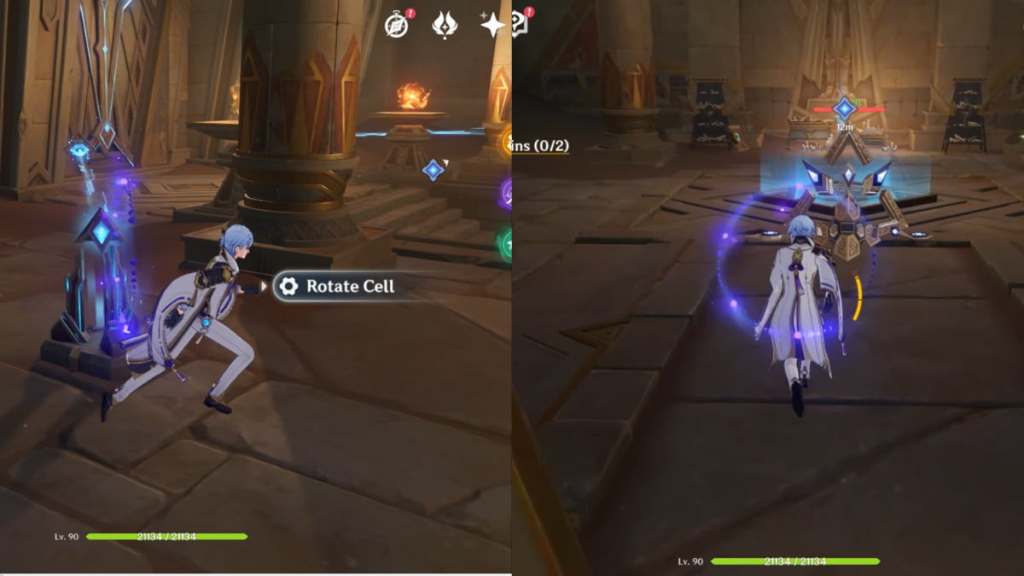
There are two Everlight Cells on the right side. Rotate each Everlight Celltwiceor until they’re attached by a blue beam to the Neverlight Cellsclosest to the door. Once both are correctly positioned, the gate will open, revealing a room with a Replicator Keystone puzzle.
Defeat the Primal Construct, then pick up the Forged Primal Light (blue prism) and place it onto the platform to reveal a device.Interactwith it to release a Primal Ember, which you need to follow all the way back to its post in Opet Hall. ensure toreleasethe Primal Ember every time it attaches itself to a device.
Related:What are the Red Vultures in Genshin Impact?
Second Primal Ember
From Opet Hall, glide downward and enter the room above the staircase. Follow the path until you enter another room, thenturn leftand keep following the staircase until you reach a clearing.
The clearing will look like the image above. Defeat the Primal Construct to get it out of the way, and if you’re still being attacked by an enemy you may’t see, simply relog to reset the map. Once you’re ready, you need to solve the small puzzle on the right.
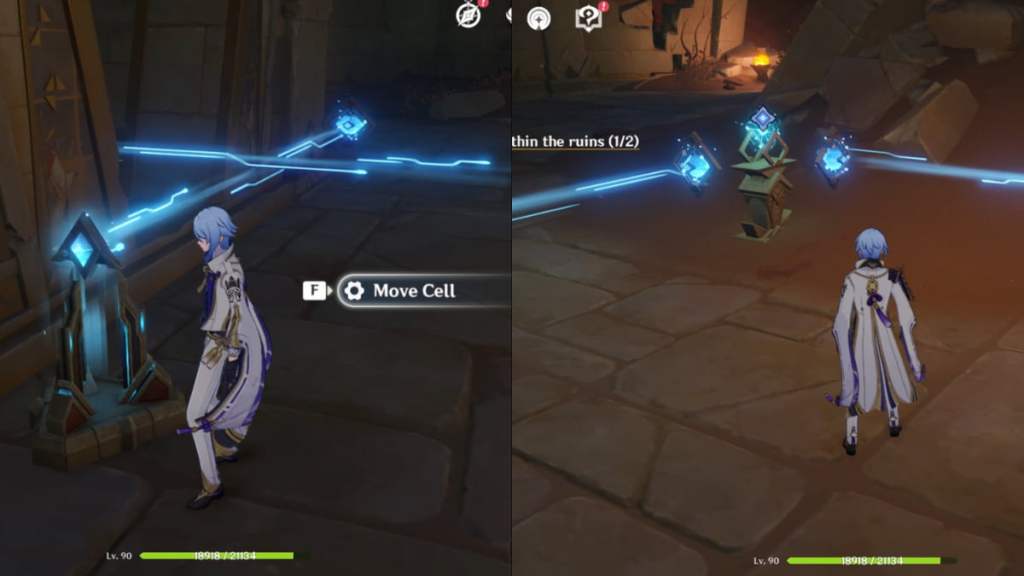
Interactwith the Everlight Cell with a blue beam to move its component to the other Cell closer to the door. This will unlock the gate, revealing a platform. Next, you need to solve the Replicator Keystone puzzle, so pick up theForged Primal Light(blue prism) and place it onto the platform inside the room.
Interactwith the Everlight Cell in front of the door to move its component back to its original position. This will unlock the device at the center, allowing you toreleasethe Primal Ember. All you need to do is follow the Primal Ember all the way to its post in Opet Hall, remembering to release it whenever it attaches itself to another device. Once you’re done lighting up both torches in Opet Hall using the Primal Embers, you can proceed to the next part of the quest.
Check out ourGenshin Impact Good Medicine Is Hard to Come By Sumeru Daily Commission guideto unlock a hidden Achievement.