As with many games, Potions add a degree of flair and fun toMinecraft, but also add a complicated hierarchy of recipes to memorize. The plus side (or to some, the downside) is that all potions must be crafted using specific recipes and there is no mixing and matching necessary to see what other potions you can create.
Minecraft Brewing and Potions Guide - All Minecraft Potion Recipes
Since allMinecraftPotions follow specific recipes and steps, brewing them is a fairly straightforward process. Except for the Potion of Weakness (which is explained at the end of this guide), there arefour basic itemsthat are necessary for all of them:a Brewing Stand, Water Bottle, and Nether Wart, and Blaze Powder.We’re first going to explain how to use these items to start your potion. Further down in the guide, you’ll find the recipes for all potions.
How to Brew in Minecraft
In this part of the guide, we’re going to explain the two basic steps to brewing anAwkward Potion,which is the base mixture needed for most potions. Once you’ve completed this part of the guide, you’ll understand the basics to brewing. If you already know how to brew and instead just need the recipes, skip to theRecipessection below.
How to build The Brewing Stand
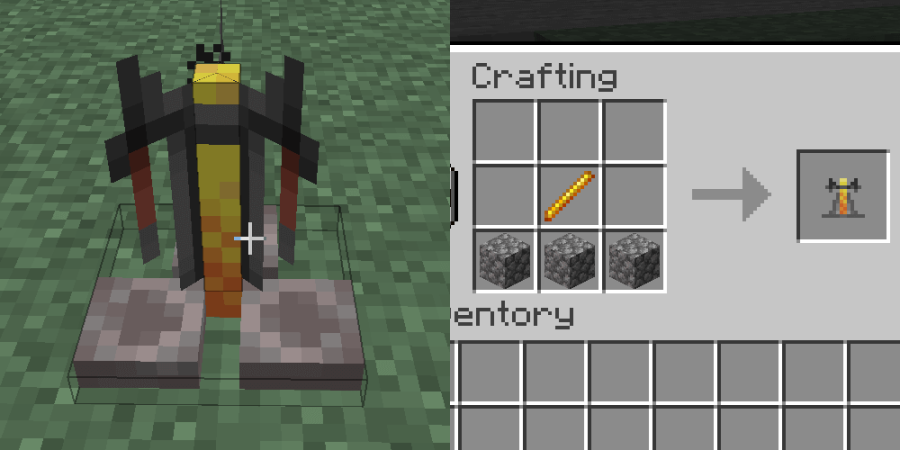
In the image above on the left, you’ll see our Brewing Stand. This is where you will perform all your alchemy in the game. On the right, you’ll see the crafting recipe for the Brewing Stand, which comprises justthree Cobblestoneandone Blaze Rod.
This is your first step to brewing. Craft the Brewing Stand and place it anywhere you’d like. We placed it in the grass outside — for fresh air, of course. Brewing potions can make the air musty.
How to make The Awkward Potion
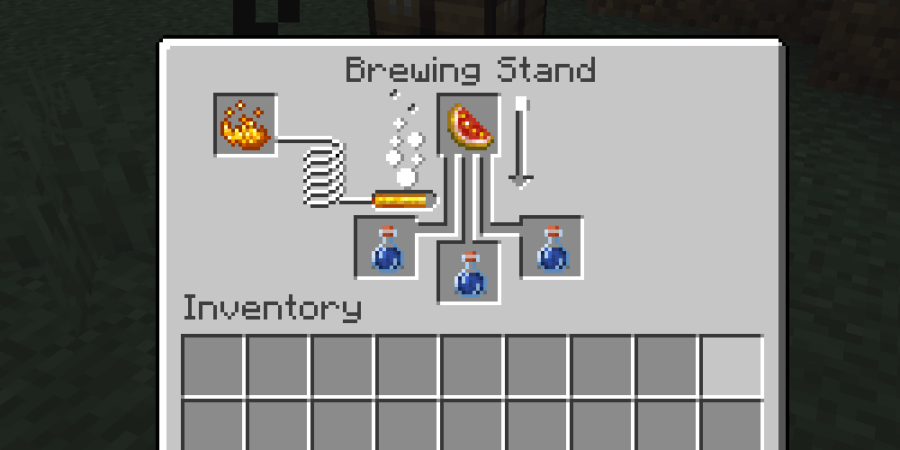
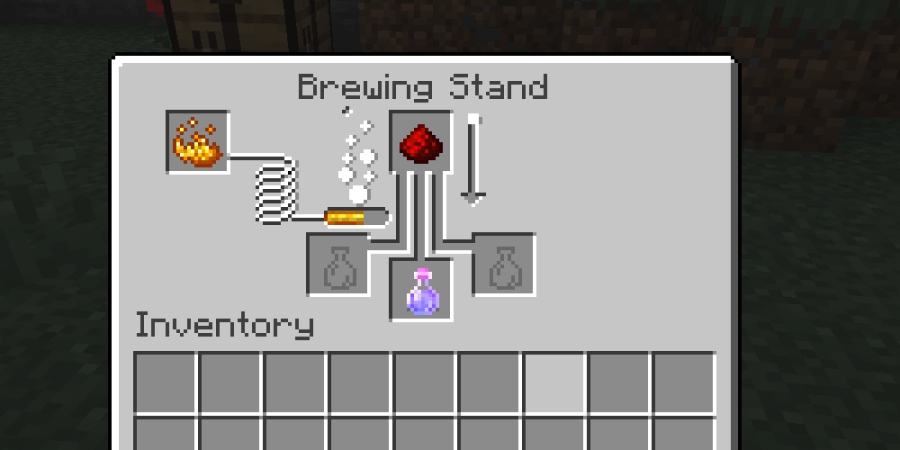
Now it’s time to take the rest of the ingredients we mentioned above to make an Awkward Potion. The image above shows you the placement for all the materials inside the Brewing Stand. Open the Brewing Stand by pressing the secondary action button/key.
Place the Blaze Powder in the slot on the top left. It will automatically disappear, and you’ll notice the fuel bar in the Brewing Stand is now filled.This is fuel for brewing. Once this bar is empty, you’ll need another Blaze Powder to make more potions.
Place the Water Bottle(s) in the slots on the bottom. For efficiency’s sake, it’s strongly recommended that you put in three bottles at a time. You can do just one or two, but the fuel burns at the same rate with every brew.
Finally, place the Nether Wart in the slot on the top. As soon as all objects are in place, the Brewing Stand will start animating its brewing process. You can use the bar to the left of the Nether Wart to determine how far along this brew is. Once it fills up all the way, you’ll see the Water Bottles have become Awkward Potions!

Related:Best Minecraft Potions and Recipes - Pro Game Guides
This is the basic process for brewing. Going forward, you will always use the same process and materials, except for the Nether Wart. The Nether Wart is only used once to make the Awkward Potion. To make the different potions inMinecraft,you’ll have to place different ingredients in the top slot.
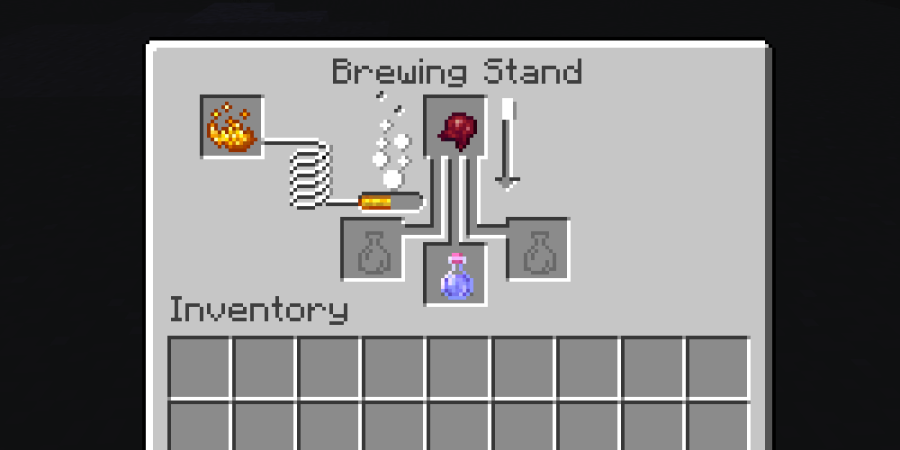
Potion of Weakness:As mentioned above, the Potion of Weakness is the one exception to the rule about brewing potions. Instead of using a Nether Wart on the Water Bottle, you’llfirst use a Fermented Spider Eye.This will make all the Water Bottles become Potions of Weakness. This recipe is explained in the Recipe list below.
All Minecraft Potion Recipes
As stated above, you will almost always need an Awkward Potion as your base for any of these potions, with the one exception being the Potion of Weakness. You will always use the process above to brew your potions with each of the ingredients listed below.
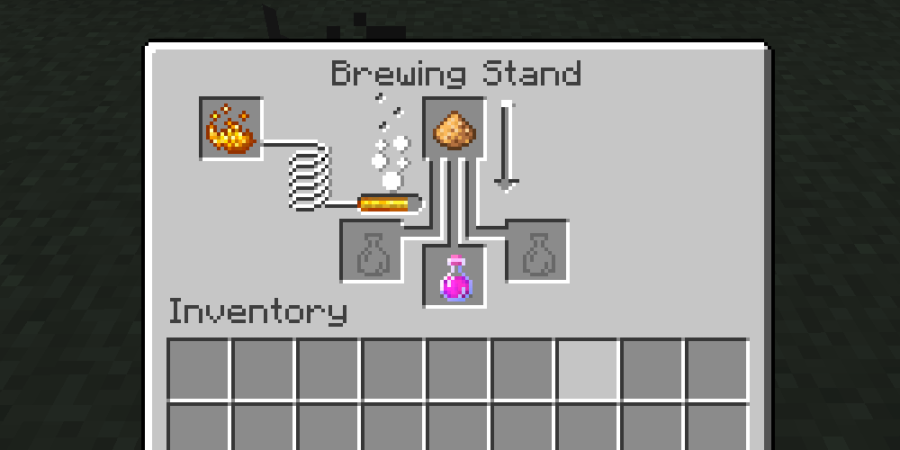
All potions are listed below in alphabetical order, based on whether they are basic potions (require one special ingredient) or advanced potions (require more than one special ingredient).You must start each of the recipes below with an Awkward Potion.Once you have the Awkward Potion(s), you mustplace the ingredients mentioned below in the top slot of the Brewing Stand.
Advanced Potions (require more than one special ingredient)
The following potions can be considered alternative versions of the potions listed above. You’ll need to first brew one of the above potions, then alter it with a Fermented Spider Eye. You can alter potions by placing them where you would normally place the Water Bottle in the Brewing Stand, then adding new ingredients.
Maximizing Potion Potency or Length of Effects - Minecraft Potions
Some potions can be altered to increase the time or potency of their effects. This is a straightforward process, but you can only increase one or the other, not both.
Extending Potion Length in Minecraft
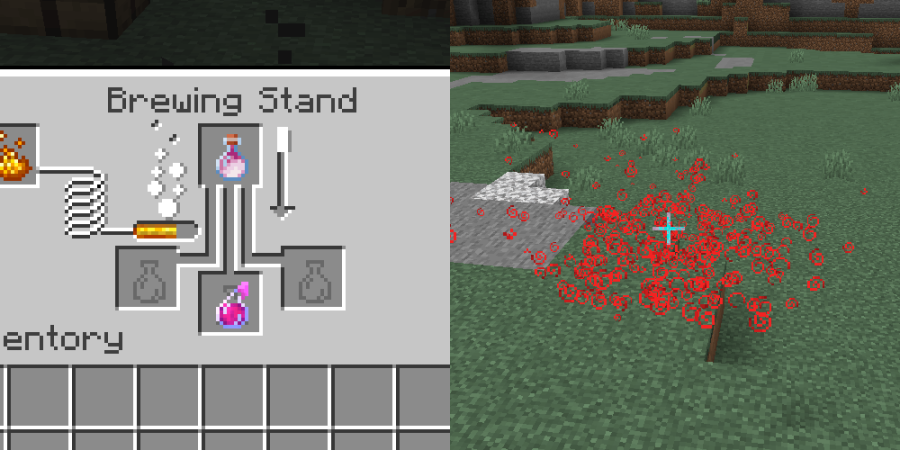
To extend the time that the potion affects you, you will addRedstone Dustas the next ingredient of the potion. The following potions can have their time increased if you brew them with Redstone Dust.
Extending Potion Potency in Minecraft
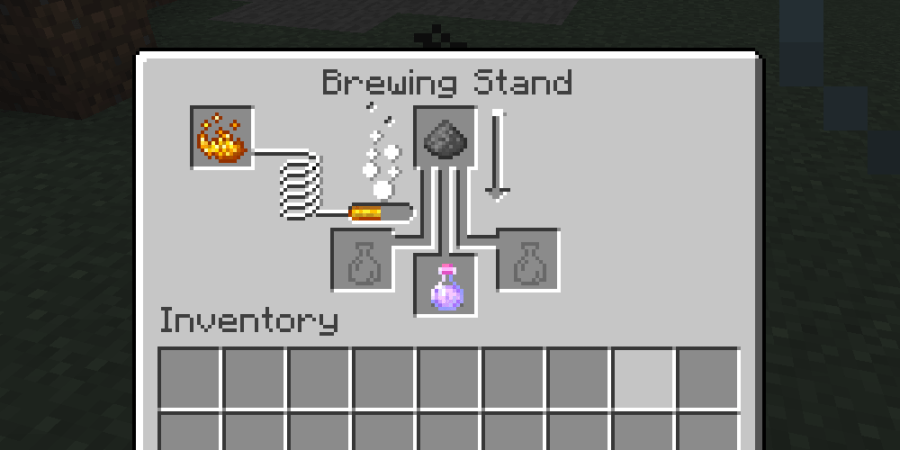
To extend the potency that the potion affects you, you will addGlowstone Dustas the next ingredient of the potion. This will usually also shorten the time that the potion affects you. The following potions can have their time increased if you brew them with Glowstone Dust.
Related:All Minecraft Music Discs and How to Get Them - Pro Game Guides
Splash Potions and Lingering Potions
The last thing to know about potions is that you can turn them into Splash Potions and Lingering Potions. These are variants of the original potions that are thrown to cause effects on players that fall within their range of effect.
How to make Splash Potion in Minecraft
Splash potions can be thrown and create an area of effect that affects all players and mobs in range.Any potion can be made into a splash potionby addingGun Powderas the next ingredient. Once thrown, the potion breaks and can not be collected again.
The duration of the effect depends on how far away the entity is from the potion when it breaks. If the potion splashes directly onto the player, it lasts the full duration of the potion. If the entity is two blocks away from the splash (splash ranges up to four blocks), then it lasts for 50% of the normal duration.
How to make a Lingering Potion in Minecraft
Lingering potionscan be thrown and create an area of effect that lingers for a period of time. Any player or mob that enters the lingering potion’s area of effect will begin to absorb some of its potency. Any splash potion can be made into a lingering potion by addingDragon’s Breathas the next ingredient. The Dragon’s Breath must be brewed from aSplash Potion, not on a normal potion.
The lingering potion starts off with a radius of 3 blocks and decreases to 0 blocks over 30 seconds. If a player walks within the area of effect, the effects of the potion are applied for one-fourth of the time of the potion’s normal duration and the lingering potion’s radius immediately drops by half a block.
If the potion does not have a duration and instead causes instant effects, the potency of the effect is half of the strength of the potion’s standard potency.
This covers everything you need to know about potions and their recipes. We will update this when new potions are added or the mechanics change, so be sure to check back with every major update!
Now you know potions, but do you know banner patterns? Check out our guide onHow to Make All Banner Patterns in Minecraft!
